Welcome to the Maserati Khamsin Registry…
MASERATI KHAMSIN EURO BUMPER CONVERSION
|
GLASS AND LIGHTS |
 |
 |
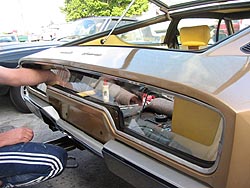
| STEP: 18 Fit the glass rubber around the new rear Plexiglas, carefully position it in the frame from the inside of the trunk. Make sure rubber fits properly all around the glass and that rubber lip protrudes around edge of glass all around within body frame to provide proper waterproof sealing. Secure glass in place by screwing frame brackets back in place. Making sure that rear light wires protrude just under the rear light openings on the inside, secure the end trim panels and the two long trim panels back in place. Clean the rubber gaskets which form the back edge of the rear lights as this is the contact area on which they will rest on the glass openings. |
 |
 |
|
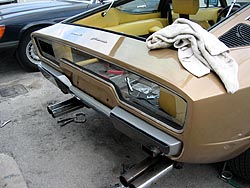
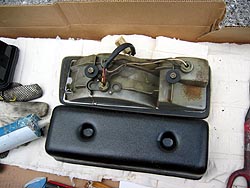
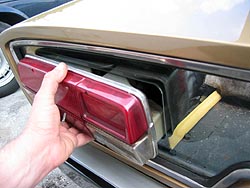
STEP: 19 Present the rear lights to the holes, attach the wires to the lights. Present the rear lids for the lights on the inside of the glass and bolt them in place (this is quite tight to do with the big rear box section trim panels in place but it can be done with a small ratchet. Do NOT overtighten. Position the trunk under-carpet back in its place, sneaking it under the box like trim sections, refitting trim securing screws, position the carpet itself back in its place and you are done. |
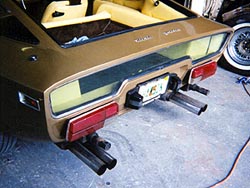 Before |
 After |
| RAISING
THE EXHAUST MUFFLERS STEP: 20 Flip each muffler upside down and switch them from side to side, fit them back in place; this will require some bracket adjustment, but is routine work for an experienced exhaust specialist. What matters is that there be no undue stress on the exhaust system; that it be seated properly and held in place properly. |
| The mufflers should now fit properly, evenly, with the tips protruding through the half moon shaped grove at the bottom of the body, as they were designed to. The bumpers can withstand a lot of heat but you want a gap between the exhaust tips and bumper regardless. The big mufflers are no longer protruding crudely, no longer visually ruining the rear upsweep which is such an integral part of the Khamsin’s design. It now looks tidy, bespoke, as it was meant to and while standing behind the car you won’t feel like huh…you are standing behind a male elephant! | 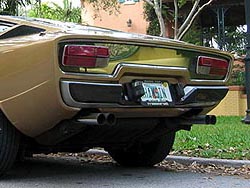 |
 |
|
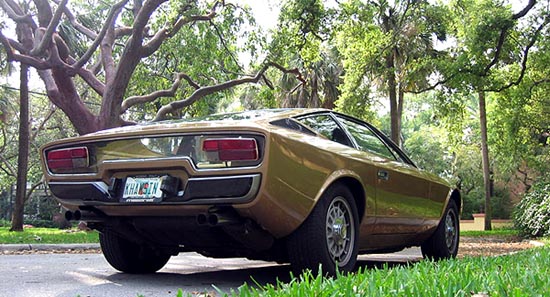
Your
emotional reward Job finished; That is it, you have finished the bumper conversion, step back and behold your work; you have restored a Khamsin to its original stunning design as intended by Maserati, Bertone and Marcello Gandini: you will never again have to explain over and over what it should look like; it does now look the way it was meant to be: congratulations! Luc
Grondin The kit suppliers are: MAK
Group Carrozzeria
Campana Material: bumpers are manufactured as the originals i.e. they have a metal core, buried in a polyurethane resin, painted in black and silver gray using original colors. Price: includes front and rear bumpers painted two tone silver and black, front and rear mounting brackets, interior tail lamp covers, rear plexiglass panel 4069 Euros + approximately 400 Euros for shipping if you are in the US: less for Europe obviously. IMPORTANT: The above article, kits and technical advice are to be bought, used and undertaken at your own risk; the procedure is best left to professionals and yes the car is safer with the big ugly US bumpers so it is your decision: the author takes no responsibility for the above; sad to have to write this but such are the times we live in. |